Table of Content
Exercise and entertainment can be a perfect combination, with devices like the Peloton gaining lots of popularity in recent years. It can control the lights, windows, doors, and many other things in your house. The NodeMCU system is easy to install and use, and it’s compatible with a variety of home automation devices and appliances. Using the above setup, you can turn any device into a smart device that can be controlled from your smartphone. 2) Next, connect the IN1 pin on the relay module with PIN 4 on the Arduino. As shown in the circuit diagram, we’ve connected a 1k ohm and a 2.2k ohm resistor across the GND and TXD pins on the Arduino.
Then, you can connect the ESP boards to actuators to actually control something and to sensors to monitor your house. In this Module, you’ll get started with Node-RED software on the Raspberry Pi. You’ll install Node-RED, learn some basic concepts, and create simple flows to control the Raspberry Pi GPIOs.
About this project
We provide instructions for installing Node‑RED, InfluxDB, and Mosquitto broker on Digital Ocean . Node-RED can send the sensor readings and any other data to InfluxDB . You can learn from experts, build working projects, showcase skills to the world and grab the best jobs. James has a BSc in Artificial Intelligence and is CompTIA A+ and Network+ certified. When he's not busy as Hardware Reviews Editor, he enjoys LEGO, VR, and board games. Before joining MakeUseOf, he was a lighting technician, English teacher, and data center engineer.

An Arduino, powered from the Pi, will interface between the electronics - radio control power switches, for now. We've talked about the relative merits of Arduino and Raspberry Pi before - they each have their strengths. They needn't be an either or choice though - combine them to get the best of both worlds. The home automation market is flooded with expensive consumer systems, incompatible with one another and costly to install.
Uploading the Code
With his system you can monitor for water leaks, see if the garage door is open, check for new mail, watch for movement, sense for gas, and even see how the dog is doing. The system uses both an Arduino and a Raspberry Pi alongside a ton of various sensors to monitor the house. You can set up the system to send you alerts when something happens or just monitor everything from your phone. Blynk is a platform with iOS and Android apps that allows you to control your Arduino, Raspberry Pi, or ESP8266 from your mobile phone.
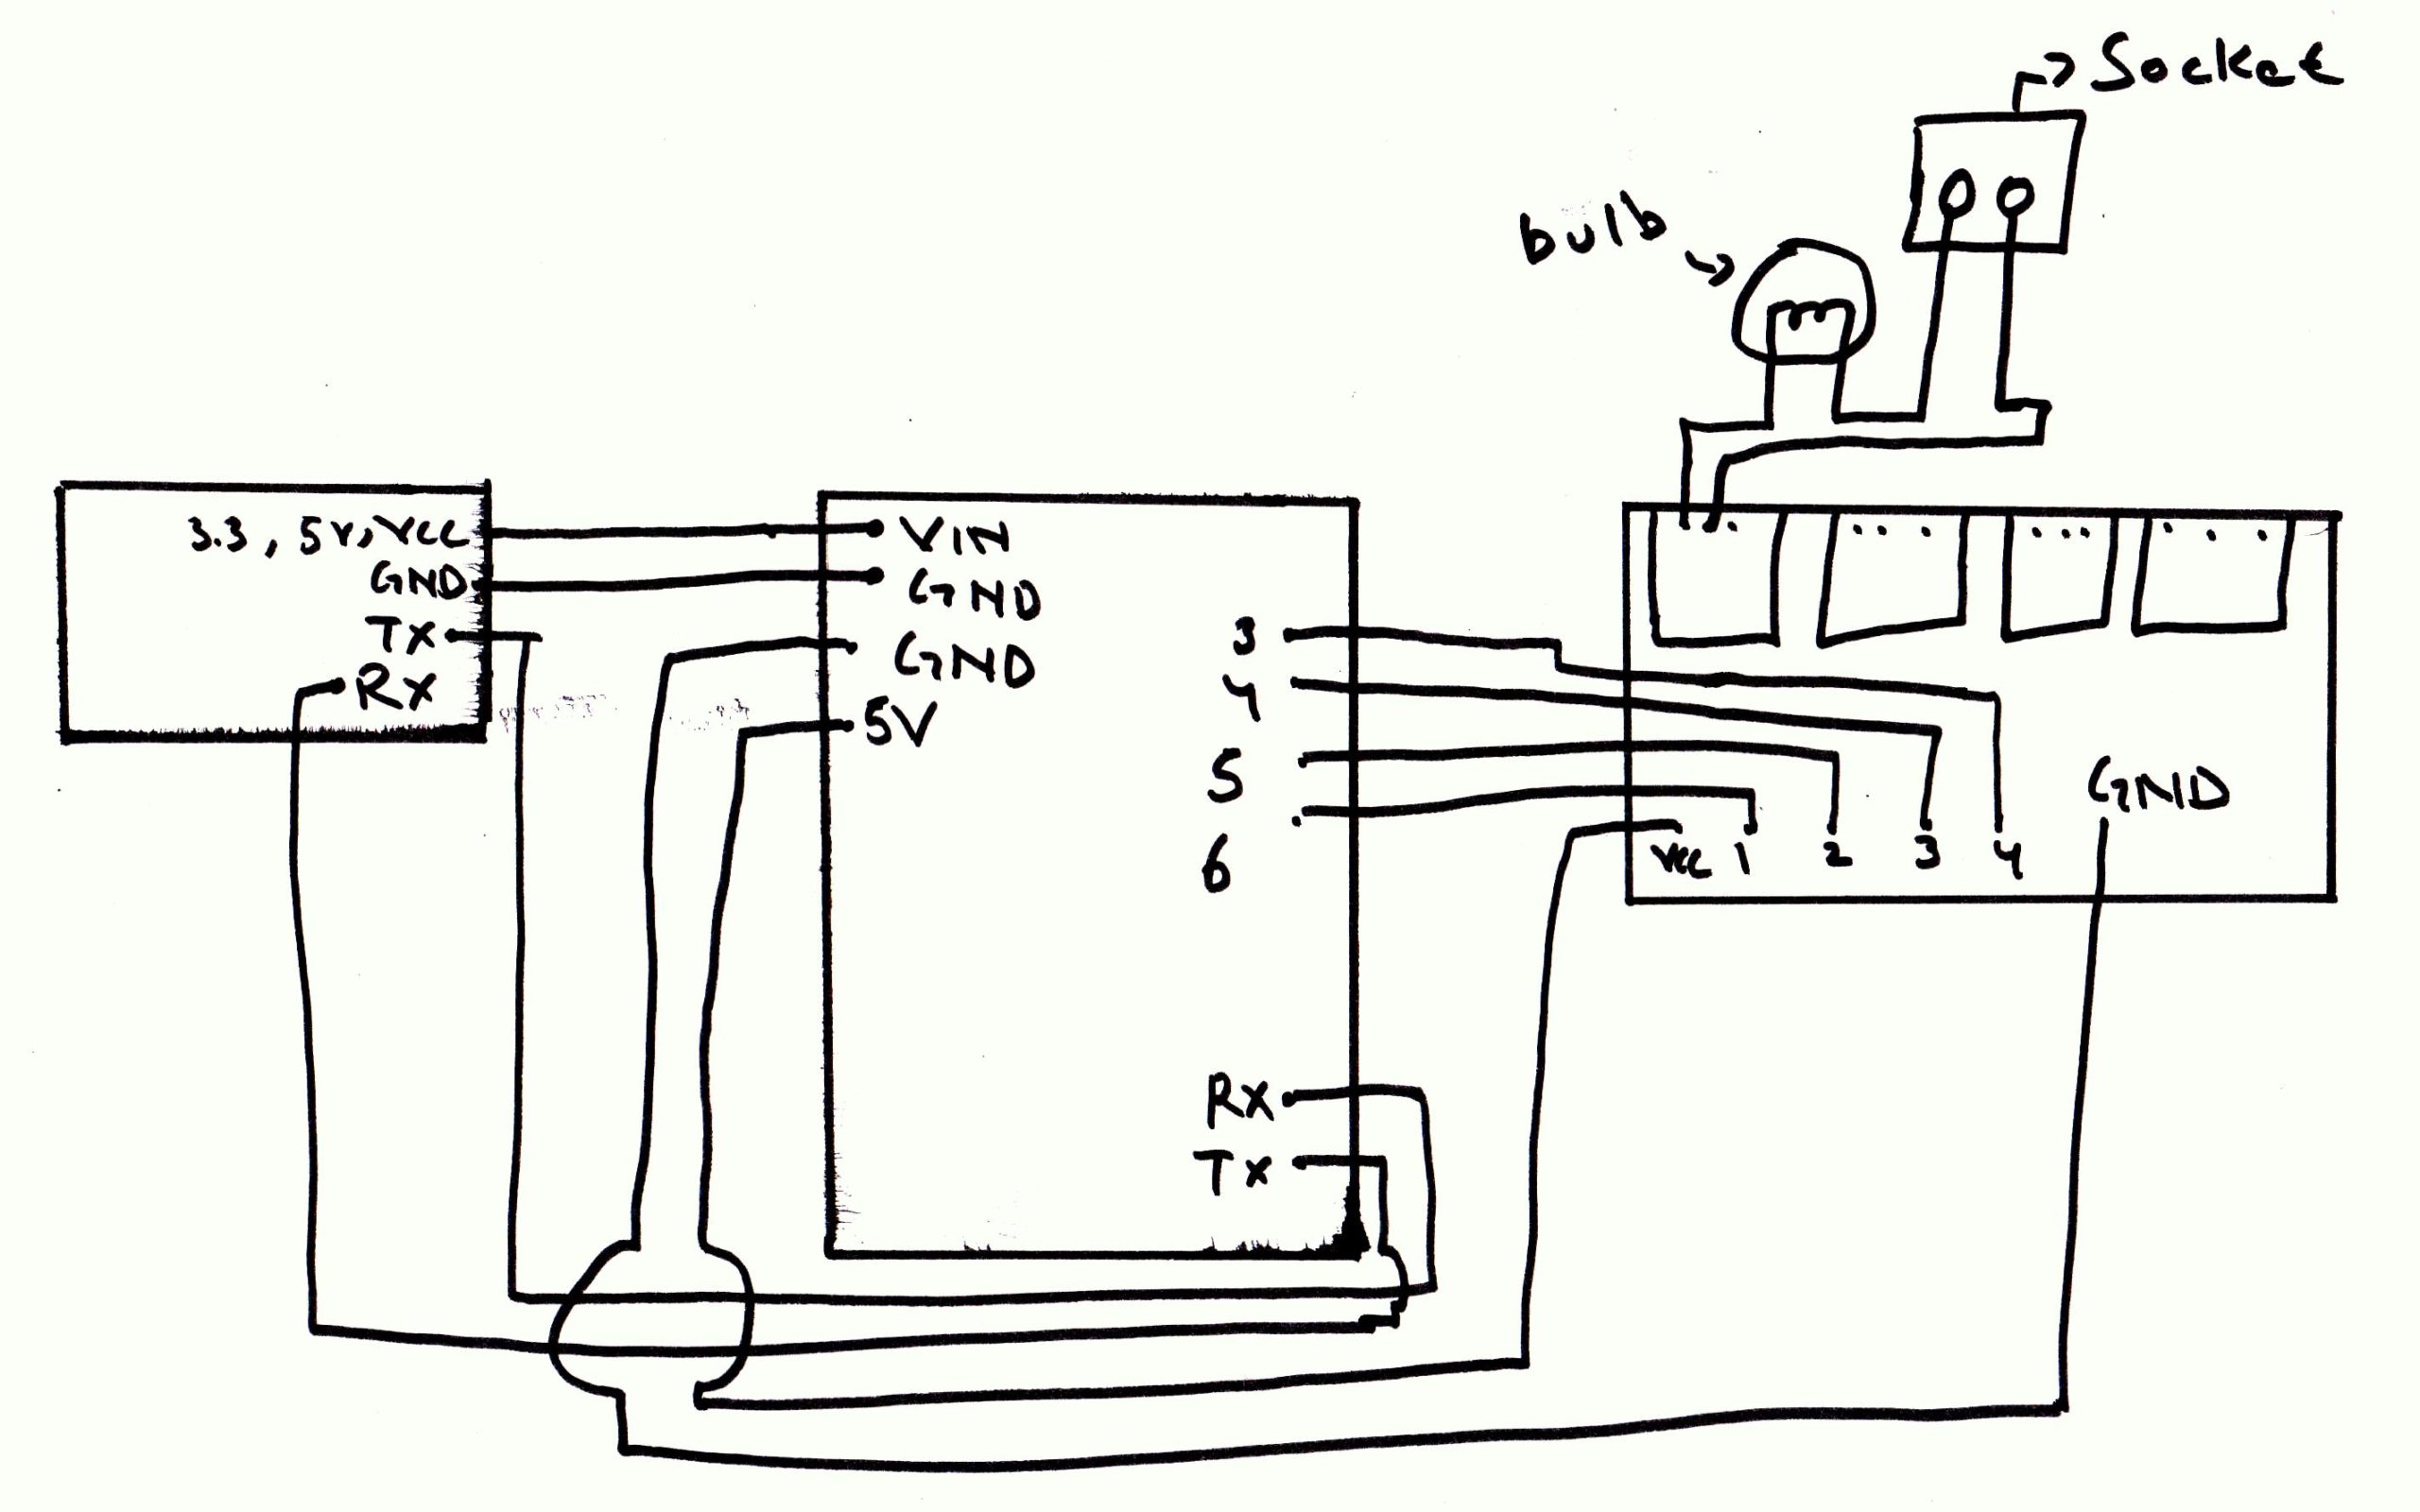
3) Connect the TXD pin on the HC-05 module with the RXD pin on the Arduino. The core hardware is rather simple and only consists of an Arduino microcontroller kit, a Bluetooth wireless module, and a relay. We will need a variable to store the message received by the HC-05 module, and variables mentioning the pins to which the LEDs are connected. This project is an IoT-based home automation system, where you can control lights via Bluetooth. The plugin works by sending "tristate codes", but these will vary by manufacturer. We're going to use Raspian for this project, and I'd strongly suggest starting from a fresh install if you've previously performed other hacks and such.
Checking if the site connection is secure
This tutorial will show you how to setup a simple home automation solution allowing you to control almost any electrical device from your smartphone. From controlling the room lights with your smartphone to scheduling events to occur automatically, home automation has taken convenience to a whole new level. Node-RED and InfluxDB are free to use locally on your Raspberry Pi.

Create a variable text to store the text of our speech, if the speech recognition button is clicked. Next, add a horizontal arrangement next to each label, and drag 2 buttons into each horizontal arrangement. First, add all the non-visible components - the speech recognition, the Bluetooth client, and the notifier. Yeas this app is not working it crash always when i fill bluetooth name and press ok.
If you get stuck at some point, you can use our forum to post your issue. You can also send us an email with your issue, and we’ll try to help as much as possible so that you get all examples working. We use Raspberry Pi to run Node-RED, Mosquitto MQTT broker, and InfluxDB locally.
Due to that issue I will switch on the camera through my phone or pc. That’s enough current for a lot of devices but not enough for high power appliances like a heater or dryer. For high power appliances you’ll likely need about twice the current capacity (~ 20 amps).
Here is a Simple DIY Home Automation System Code, you can copy the code and paste it in your Arduino IDE. But before that, you need to add Blynk Library to Arduino IDE. Finally, you can use nodemcu to create a home automation system that is completely customised to your needs. Maker.pro needs to review the security of your connection before proceeding. Here is a link for a small solid state relay package that is offered in 2,4, or 8 channels. 2) Next, it will list all the available devices in your vicinity. You can either upgrade to a higher current relay, or place multiple relays in parallel.

Home automation can be defined as a system that automates and controls various home appliances and devices automatically. For example, it can turn on the lights when you enter the room, or turn off the TV when you leave the room. It can also adjust the temperature of the room automatically based on the weather outside. Now that we have setup the hardware and successfully uploaded the code, the next step is to control the setup from a smartphone. The next step is to connect the Arduino to a relay module, so that we can turn the connected device ON/OFF.
If you don’t have a Raspberry Pi, you can install all those on a cloud Linux server, for example. We provide installation instructions if you want to use Digital Ocean . If you can’t get a Raspberry Pi, you can still follow along and build your home automation system on the cloud, which requires a monthly payment for the hosting service. Eventually I'd like a hardwired relay, but for now I'll be using the safer option of radio-controlled switches. Before we begin, here's a demo video from the project creator himself.


No comments:
Post a Comment